How To
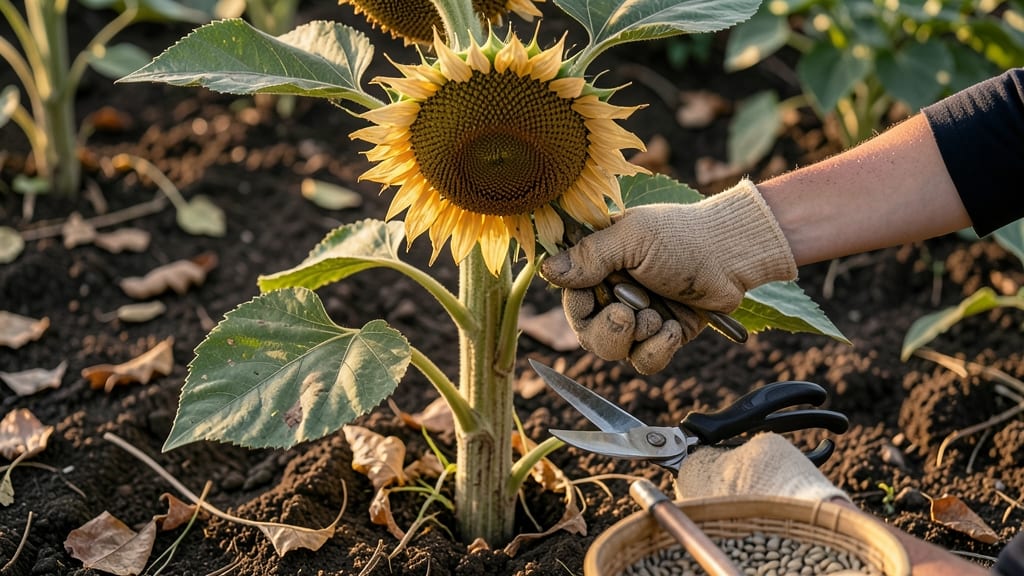
Telling when sunflower seeds are ready to harvest means watching for three key changes in the 🌻 head: a deep brown color, dry petals, and seeds that rattle when shaken.
Sunflowers aren’t just beautiful—they’re a bountiful harvest waiting to happen. But knowing exactly when those seeds are ready to pick can mean the difference between a delicious snack and a bitter disappointment.
You’ll want to check your sunflowers in late summer or early fall, when the back of the head turns yellow and the petals begin to drop. This is your cue that the seeds are nearly ready, but there’s still one more test to confirm ripeness.
Below, I’ll walk you through the finger-press method, the best time of day to harvest, and how to store your seeds so they stay fresh for months. No more guessing—just a foolproof way to know when your sunflowers are truly ready.


3 Visual signs sunflower seeds are ready for harvesting
Harvesting sunflower seeds at the right time ensures you get plump, flavorful seeds perfect for snacking or planting. But how do you know when they're truly ready? The key lies in three visual cues that signal maturity.
These signs help you avoid harvesting too early—when seeds are still hard and bitter—or too late, when they've scattered on the ground.
First, pay attention to the seed head color. A mature sunflower head will transition from green to a rich, golden-brown hue. This color change indicates the seeds inside have fully developed. Second, watch for seed color transformation—the seeds themselves should turn a deep, creamy white or light tan.
Finally, the flower stem will begin drying out, signaling the plant is redirecting energy to seed maturation.
Here’s what to look for—plus what to avoid—to ensure you harvest at peak ripeness:
-
1. Head Color Changes to Brown
The back of the seed head turns from green to golden-brown. This indicates the seeds are fully mature and ready to harvest. -
2. Seeds Turn Creamy White or Light Tan
Look inside the head—seeds should no longer be green or translucent. Instead, they’ll be plump and opaque white. -
3. Petals Dry and Fall Off
The outer yellow petals will wither and drop away, leaving only the seed head. This is a clear sign of maturity. -
4. Stem Begins to Dry Out
The flower stem will feel brittle and dry. Gently shake the head—if seeds rattle loudly, they’re ready.
One common mistake is harvesting when the head is still partially green. This means the seeds are underdeveloped and may not store well. Another red flag is a soft or spongy head—this suggests the seeds are overripe and may have sprouted or attracted pests.
Always harvest on a dry, sunny day to prevent mold or rot during storage.
If you’re unsure, perform the finger-press test: Gently press a seed with your thumbnail. If it gives slightly but doesn’t crush easily, it’s ready. If it’s too hard, wait a few more days.
For roasting seeds, harvest when the head is fully brown but before seeds scatter. For planting next season, let them dry on the stalk for another week or two.
Timing is everything with sunflowers. Harvest too early, and you’ll end up with bitter, unripe seeds. Harvest too late, and you risk losing your harvest to birds or weather. By watching for these three key visual signs, you’ll know exactly when to pick—ensuring a bountiful harvest every time.
Once you’ve harvested, let the heads dry in a well-ventilated, dry place for 1-2 weeks. Then, rub the seeds free by hand or use a clean cloth.
Store them in an airtight container in a cool, dark place for up to a year. With these tips, you’ll never miss the perfect harvest window again!
How to test sunflower seed ripeness: the finger-press method
Once you’ve spotted the visual signs of ripeness, the next step is to confirm with a simple tactile test—this is where the finger-press method comes in.
This hands-on approach ensures you’re harvesting at the perfect moment, whether you’re saving seeds for next year’s garden or roasting them for a snack. The key is understanding what each stage of pressure tells you about seed maturity.
Start by selecting a fully mature sunflower head—one that’s completely brown and dry. Gently grasp the outer bracts (the papery layers) near the base of the head.
Apply light pressure with your thumb and forefinger, then release. If the bracts spring back to their original shape, the seeds likely need more time on the stalk.
Now, increase the pressure slightly. If the bracts bend but don’t break, the seeds are approaching ripeness but may still need 1-2 more days.
This is the critical stage—harvesting too early here can leave seeds underdeveloped, while waiting too long risks them falling from the head or attracting pests.
⚠️ callout warning
Applying too much force can crush the seeds or cause the head to split prematurely. Test with gentle, controlled pressure—think of it like squeezing a ripe peach, not a stress ball.
For roasting seeds, harvest when seeds rattles loudly but the head still feels slightly firm. For planting seeds, wait until the head feels light and hollow when shaken.
When the bracts give way slightly under pressure but don’t snap, and the seeds inside rattle loudly when you shake the head, you’ve hit the sweet spot.
This is your cue to harvest for roasting. For seed saving, wait until the head feels nearly hollow when lifted—this ensures maximum viability for planting.
Timing matters even more if you’re dealing with humid conditions. In damp weather, the finger-press test becomes even more critical, as seeds can mold if harvested too late. Always pick on a dry morning after dew has evaporated to get the most accurate reading from your tactile test.
Pro tip: If you’re unsure, harvest a few heads at different stages and compare the seeds. Store them in a paper bag (not plastic) for a week to dry further. The ones that pop open easily when dry are your winners—ready for roasting, planting, or sharing with fellow gardeners!